

A Beginner’s Guide to Building Your First Car Audio System!
A Beginner’s Guide to Building Your First Car Audio System
Upgrading your car audio system can be one of the most rewarding mods you’ll ever do—but if you’re new, it can also feel confusing and expensive. Amps, subs, RMS, ohms… where do you even start?
Good news: you don’t need to be an expert or spend thousands of dollars to build a great-sounding system. This guide will walk you through the basics step by step, in plain language.
1. Start With Your Goal (Not Your Wallet)
Before buying anything, ask yourself:
-
Do I want better sound quality?
-
Do I want more bass?
-
Do I want it loud or just clean and clear?
-
Am I upgrading slowly or all at once?
Your goal determines everything—what speakers you buy, whether you need an amplifier, and how much power is required. Many beginners overspend because they buy parts without a plan.
👉 Pro tip: A balanced system always sounds better than one powerful part with weak supporting gear.
2. Understand the Main Parts of a Car Audio System


Here are the core components you’ll hear about most:
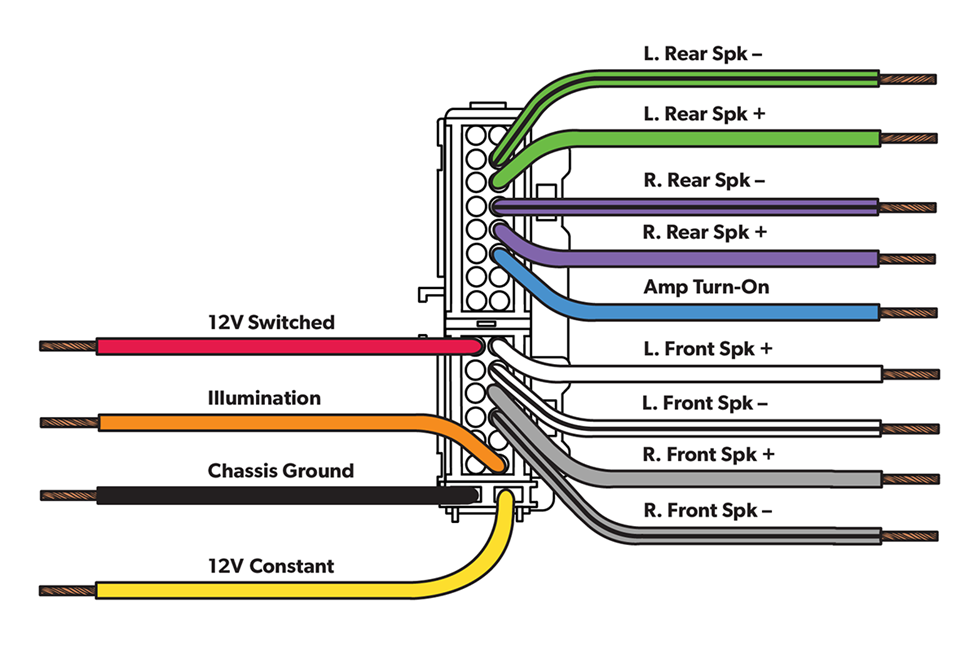
🔹 Head Unit (Stereo)
This is your control center. It handles:
-
Volume & EQ
-
Bluetooth / Apple CarPlay / Android Auto
-
Audio signal quality
Many factory radios are weak. Upgrading your head unit is often the best first step.
🔹 Speakers
Your car usually has:
-
Door speakers (mids & bass)
-
Tweeters (high frequencies)
Aftermarket speakers are clearer, louder, and handle more power than factory ones.
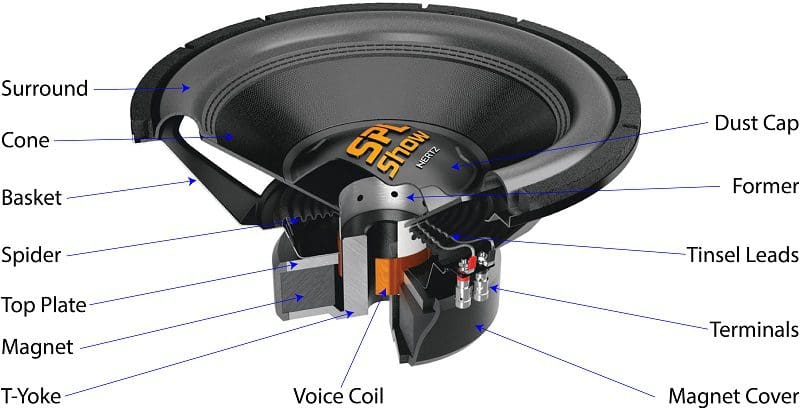
🔹 Subwoofer
Subs produce low bass you can feel. Door speakers cannot do this well on their own.
If you love hip-hop, EDM, or bass-heavy music, a subwoofer is essential.
🔹 Amplifier (Amp)
An amp provides clean power. Factory radios don’t supply enough power to make aftermarket speakers or subs shine.
👉 Important: More power ≠ better sound if it’s not matched correctly.
3. Learn These 5 Car Audio Terms (They Matter!)

You don’t need to know everything—just these basics:
-
RMS Power – Real, usable power (ignore “max” numbers)
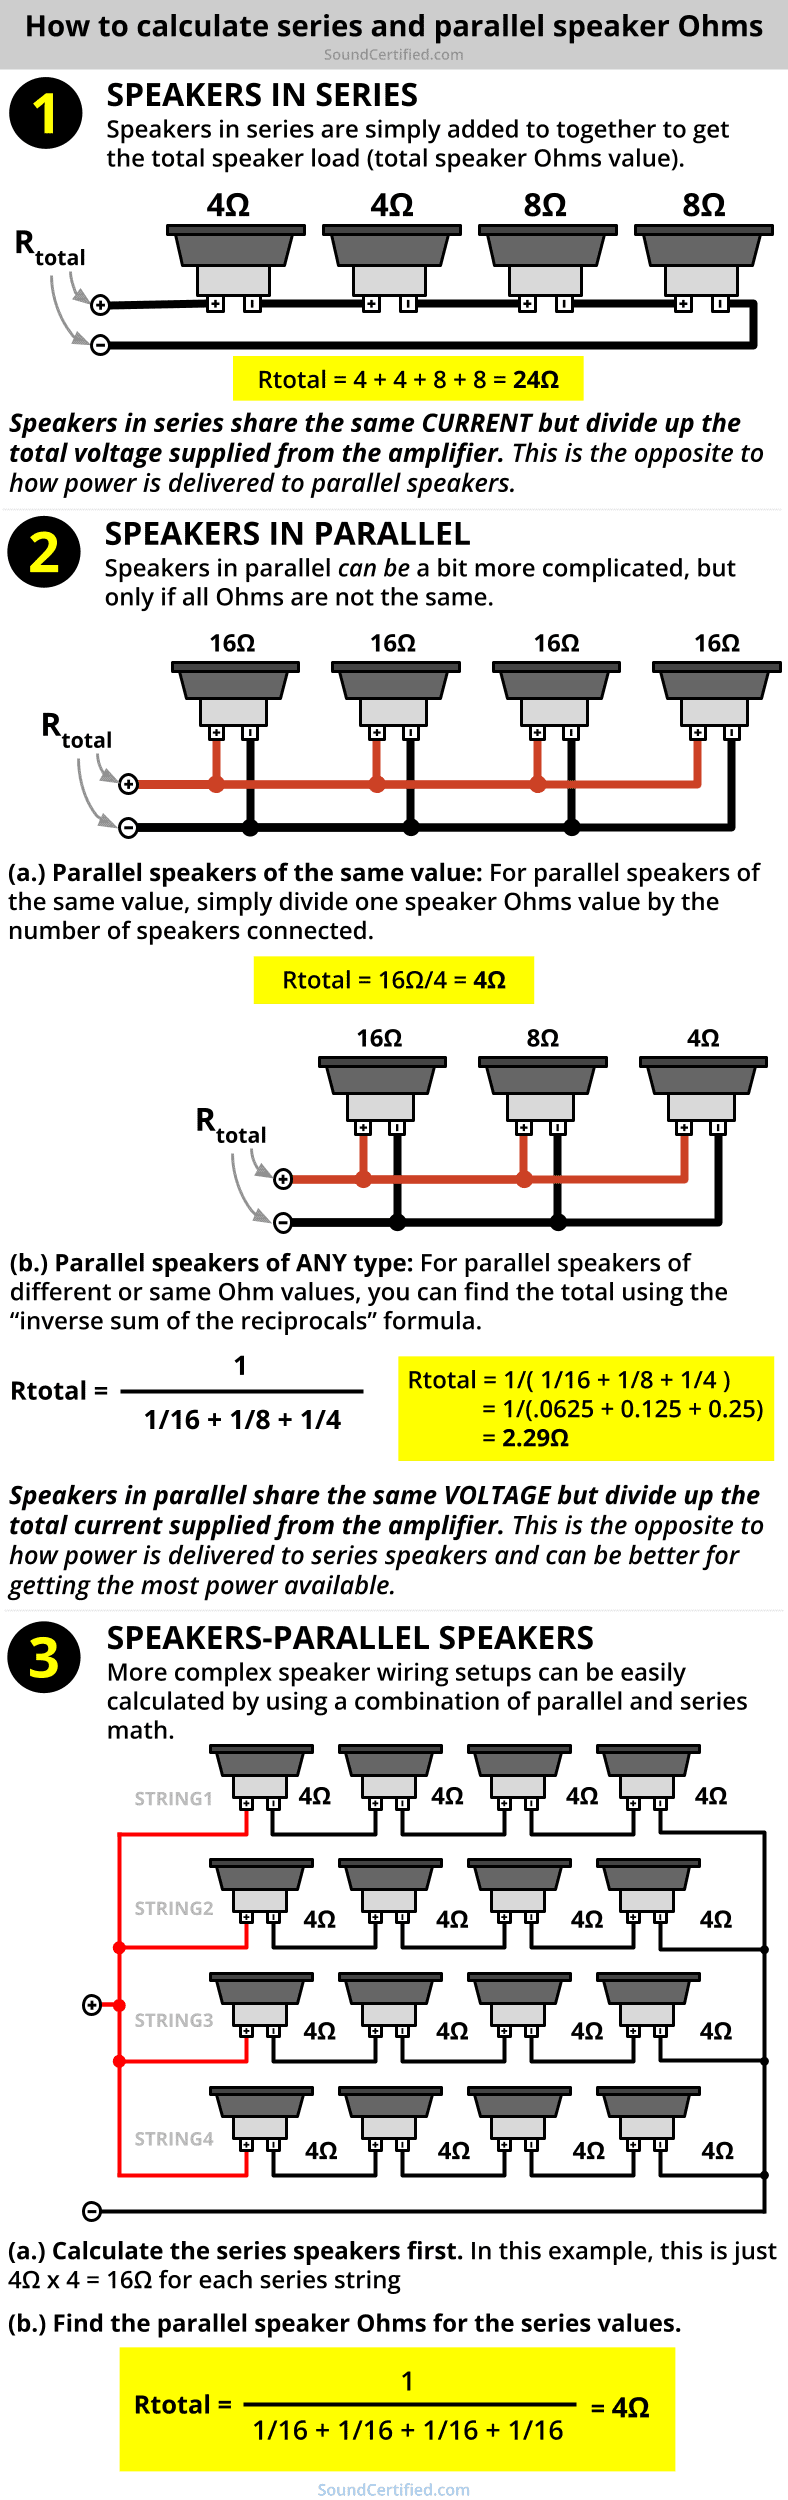
-
Ohms (Ω) – Speaker resistance; must match your amp
-
Sensitivity – How loud a speaker gets with less power
-
Channels – How many speakers an amp can power
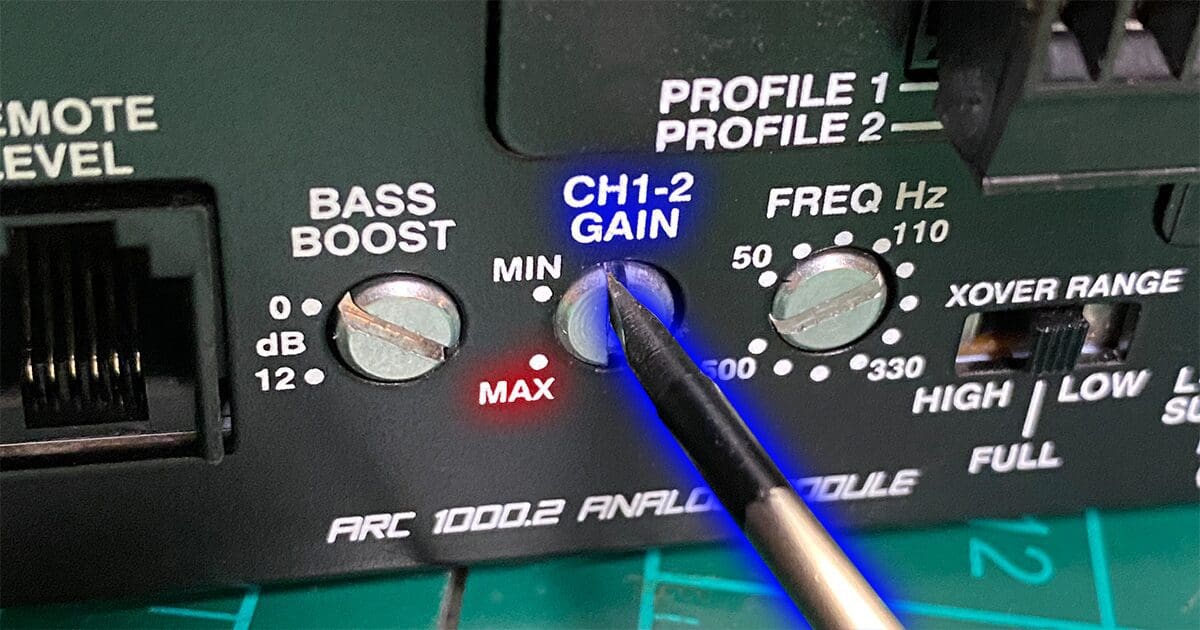
-
Gain – NOT a volume knob (setting it wrong causes distortion)
Understanding these prevents blown speakers and wasted money.
4. A Simple Beginner Upgrade Path (Recommended)
Instead of doing everything at once, follow this order:
✅ Step 1: Upgrade the Head Unit
Instant improvement in clarity and features.
✅ Step 2: Replace Door Speakers
Clearer vocals and cleaner sound.
✅ Step 3: Add an Amplifier
Brings speakers to life.
✅ Step 4: Add a Subwoofer
Completes the system with real bass.
This approach keeps things affordable and beginner-friendly.
5. Budget Expectations (Realistic Numbers)
You can build a solid system on a budget:
-
Head Unit: $100–$300
-
Door Speakers: $80–$200
-
Amplifier: $150–$300
-
Subwoofer + Box: $150–$400
-
Wiring & Install: $50–$150
💡 You don’t need top-tier gear to sound good—proper installation and tuning matter more than brand names.
6. Installation: DIY or Professional?
-
DIY saves money and teaches you a lot
-
Professional install saves time and avoids mistakes
If you DIY:
-
Use a proper wiring kit
-
Ground the amp correctly
-
Secure everything (loose gear = noise & danger)
7. Common Beginner Mistakes to Avoid ❌
-
Buying based on max power ratings
-
Mixing mismatched speakers and amps
-
Turning amp gain all the way up
-
Ignoring sound deadening
-
Expecting door speakers to hit subwoofer bass
Avoiding these mistakes puts you ahead of most beginners.
Final Thoughts: Keep It Simple & Enjoy the Process
Car audio is a journey, not a race. Start simple, learn as you go, and upgrade over time. A well-planned beginner system can sound better than an expensive system that’s poorly matched.
If you’re just starting out, remember:
Clean sound beats loud noise every time.